
Extended ACL Network Diagram
Extended ACL Network Diagram

Extended ACL Network Diagram Placement

Extended ACL configuration

Named ACL Configuration

Named Extended ACL configuration

Extended ACL configuration

Testing Telnet

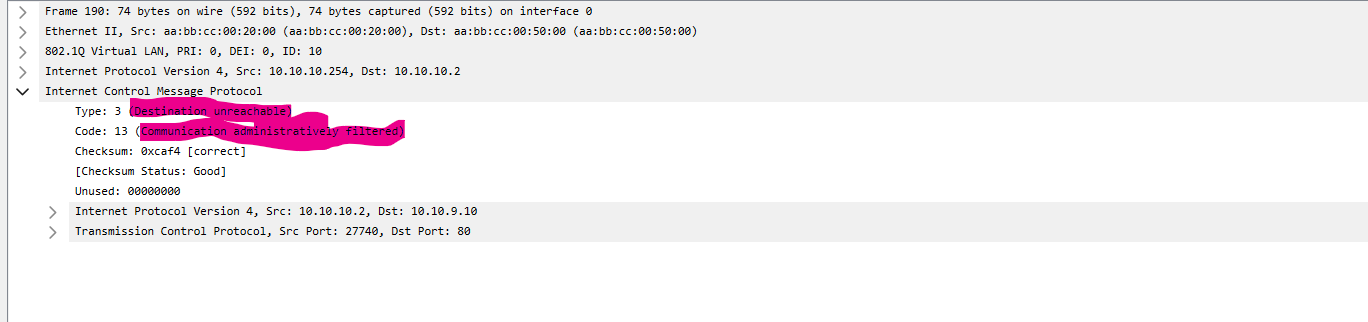
Testing HTTP

Telnet Test After Applying ACL

syslog Message of Filtering Traffic Based on ACL

Wireshark Telnet Capture
Wireshark Telnet Capture with ACL Filtering

show access-list command and output showing matches

Editing a Named ACL

Show access-list after editing